Best Deal On Metal Roofing For Your Home
(Guaranteed Results In Just One Day!)
A metal roof installation can be measured with several different scaletools, including the following tools: laser distance measurer, whole house vernier calipers, measuring tape. The best measurements are taken by placing one end on the ground and extending to either end of the surface you’re working on (though they do not possess accuracy).
A laser distance measurer is probably your best bet for this as it’s accurate up to an inch, which is acceptable for a metal roof installation. However, to use a Laser Measurement Device properly, you have first to set it up at least 10 feet away from the drip edge you measure from so that it can establish its baseline.
Can I install a metal roof by myself?
YES. You can install a metal roof yourself, but it’s not recommended if you haven’t done this before because it is dangerous and requires a lot of know-how. The best way to go about it would be to hire a reputable company with roof installation near me or a roofing contractor to help you with this job.
Metal roofs are difficult to install because they come prefabricated in large pieces that vary from one manufacturer to the next. Each piece must be cinderblock, bolted together or screws in place, and then fastened to the house. If you plan on installing one by yourself, there’s too much that can go wrong that might cost people lives and lots of money if anything goes awry.
Required tools
The Required tools for a new roof installation is a sturdy ladder, a complete set of standard roofing nails in a magnetic-hold coil that has been magnetized by striking them with a hammer before loading into the coil, an ice scraper or chisel, 5″ galvanized nails for porthole vent installation only and in all structural cases where no other means of stabilization is provided in the shingle seam. In addition, installation tools required by new building codes for gable vent installation include dome shields and staples.
How do I estimate the cost of a metal roof?
Estimating the cost of a metal roofing installation largely depends on whether or not you already have slates, tiles, ridge cap shingles, or asphalt shingle installation in place. If your roof is new, there’s just one option in a roofing project with metal sheets. Metal roofs are low maintenance and can last an exceptionally long time if properly installed, so they’re often sought out for their value with customer retention in mind. This is why it’s important to take an accurate measurement of the length of your house for workmanship purposes before new roof installation; otherwise, local codes will require that pieces be made to fit together when it comes time to install them!
How is metal roofing priced?
Metal roofing prices are based on the size of the metal panels, the shape of the metal panels, industrial-grade versus architectural grade steel – industrial grade will be more affordable but may not hold up as well under pressure – long-term cost savings may be better with architectural quality. Copper is typically atorvastatin higher priced than either copper or aluminum if aesthetics are a top priority. If you have the square footage to cover with your roof deck, there is often some degree of variation in pricing depending on how much square footage needs to be insulated over that square footage.
Metal shingle roof cost
The cost of metal shingles varies depending on the length, width, amount, and type of coverage needed. A new roof installation can typically cost $5-6 per square foot in low-slope applications, which typically includes only roof shingles and no roof underlayment. The average price for a medium slope application starts at $7-$8 per square foot.
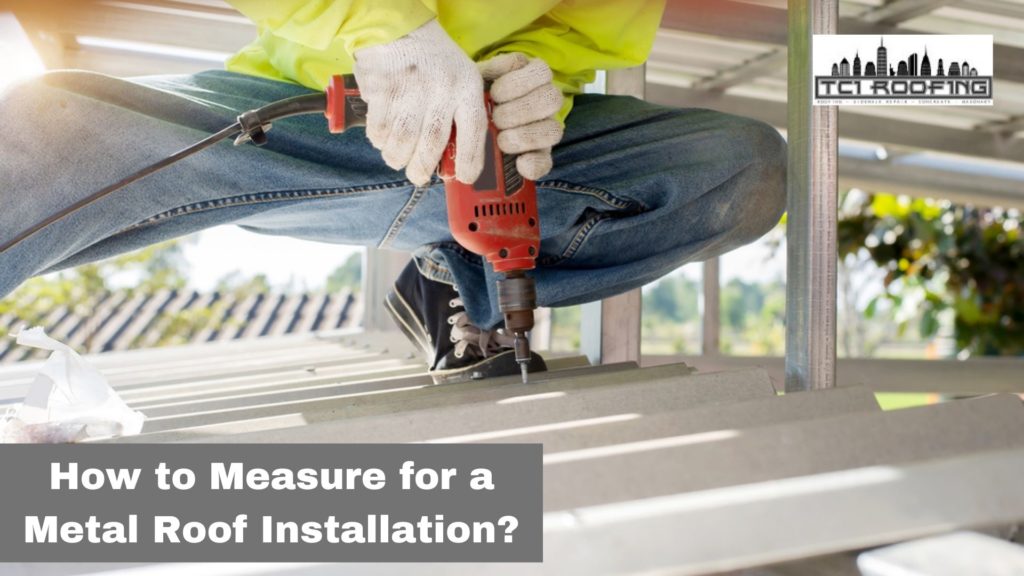
How do you measure a roof installation?
The best method to measure a roof installation is measuring the distance between the last three courses at its apex. If you’re able to do it, the better way would be to measure from one end of the roof to another. This will give you a more accurate measurement as there might be obstructions such as overhanging balconies and dormers that make 3-course measurement difficult. All measurements should ignore jambs and go up directly from the outside wall. Ideally, all areas with access for this type of work should also have 2 ft (0.6m) clearance for safety reasons, and 1 ft (0.3m) clearance on each side where necessary – these distances may vary depending on our equipment set-up.
Step 1
The first step of a new roof installation is the removal of all existing roofing materials. Next, you’ll want to use plywood or aluminum flashed with tar to provide a clean, dry working surface for the new roofing material and protect from any water damage during rainfall. Once you have this area properly prepared, it’s time to go back over everything you just did and seal up all gaps or holes that might present a problem if left open. In many cases, these will be the points where your old roof meets your house.
Step 2
Putting up a new roof is laying out the tar paper and felt paper. This step involves cutting the long edges and figuring out where and how to best lay things down (and if you’re building with wood, then this is also one of the most important steps because it’s when you nail everything into place) by marking off measurements on your roof or floor with a pencil—the longer, the better for your most accurate work.
Best practices for installing tar paper include using an unwanted piece as soon as it becomes available rather than storing many sheets; always overlapping seams; staggering seams to avoid creating ladder-like lines; stretching along its length, not across width; overlapping by at least 4 inches on successive layers.
Step 3
Install flashing between roof and parapet, chimney, or other appurtenances. New roof installation should include new flashing to prevent water infiltration through defects in the building’s envelope. When installing flashing use, high-quality fasteners are made explicitly for this function. Flashing is often copper with a stainless steel “washer” on either side, making it more corrosion resistant against moisture intrusion. Flashings are available in pre-formed shapes, which you can bend easily by hand to fit your application, or custom flashings are made from copper sheet metal which is more flexible but requires special tools for bending.